This was our summer project last year, we just set it up again and are planning to continue to add to it this summer. We started out with a few felt fish that we made and added a new fish, plant, or sea animal each week. It was a family project, the kids picked out a fish, my husband or I made the fish out of felt and then we learned a little bit about the fish before we added it to out felt tank. So far, we have a shark, angel fish, parrot fish, octopus, clown fish, lobster, sting ray, blue crab, sea turtle, sea horse, whale, and some others. This was a fun and educational project, my kids are looking forward to adding to it again, as am I. This also goes well with our Under the Water tote that I am putting together for July.
The fun never ends! It is always hectic here, but I have learned to embrace craziness! It takes a lot to keep my kids busy, but I do believe that I have that mastered! I like things tidy, but let's be honest, messy play is the best play! Crafting, Cooking, and Baking is what I like to do! This is a collection of the random things I do to keep my kids and myself busy and creative.
Sunday, June 30, 2013
Saturday, June 29, 2013
The Itsy Bitsy Spider Felt Story
The itsy bitsy spider
Climbed up the waterspout
Down came the rain
And washed the spider out
Out came the sun
And dried up all the rain
And the itsy bitsy spider
Climbed up the spout again
Climbed up the waterspout
Down came the rain
And washed the spider out
Out came the sun
And dried up all the rain
And the itsy bitsy spider
Climbed up the spout again
Peanut Butter Cup S'mores Anyone??
I love S'mores almost as much as my kids do! Today we had some friends over, started a camp fire, and roasted marshmallows to make S'mores. I do enjoy S'mores made with Hershey's Chocolate Bars, but my absolute favorite way is with a Reese's Peanut Butter Cup.
Chocolate + peanut butter + marshmallow + gram crackers= HEAVEN
Don't take my word for it, try it out for yourself! Trust me, you won't regret it!!
Just replace the chocolate bar with a peanut butter cup and enjoy!
Thursday, June 27, 2013
Fun With Fruity Putty!!
My kids had a blast with Fruity Putty! Not only is it fun to play with, but it smells great and is easy to make too! It resembles a play dough, but with a little different feel. I know that makes absolutely no sense, but I can't explain the texture! My kids enjoyed it and it smells awesome!!
Ingredients:
Small Box of Sugar Free Flavored Gelatin
2 Cups of Flour
1 Cup of Salt
4 Teaspoons of Cream Of Tarter
2 Cups Boiling Water
2 Tablespoons Vegetable Oil
Mix together all of the dry ingredients in a bowl.
Add the boiling water and vegetable oil. Mix it together a bit and pour it in a pot.
Stir over medium-high heat until the mixture forms a ball.
Place the ball on wax paper to cool. Store in an air tight container to preserve.
Tuesday, June 25, 2013
Another Silly Putty Recipe!
I came across another recipe to make our own Silly Putty, so of course, we had to try it out.
Of the 2 Recipes we tried, we liked this one the best. This one is less sticky and gooey than the other recipe. This silly putty definitely resembles traditional Silly Putty more that the other recipe-- it even bounces a little. This recipe makes a small individual amount, so each of my kids made their own batch.
All you need is:
1 Tablespoon Elmer's Glue (white school glue)
1/2 Teaspoon Epsom Salts
1/2 Teaspoon Water
Mix the salts with the water. Add the glue and mix well.
Remove the putty and pour out any remaining liquid.
Have fun!
Store in a Ziploc bag to preserve.
Monday, June 24, 2013
Make Your Own Silly Putty!
We had so much fun making our own Silly Putty today and even more fun playing with it! With just two ingredients, it couldn't be easier to make!
You can store it in a Ziploc bag to preserve it.
*This Silly Putty is a bit sticky and it resembles more of a solid/very thick slime.
All you need is Elmer's Glue (white school glue) and liquid starch.
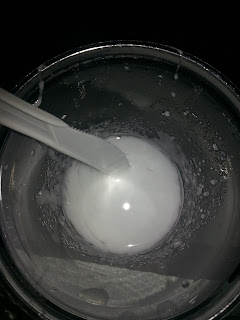
You can make as much or as little as you want, mix 1 part of each in a disposable cup till it forms a putty. Take the putty out of the cup and dispose of the liquid.
You can store it in a Ziploc bag to preserve it.
*This Silly Putty is a bit sticky and it resembles more of a solid/very thick slime.
Sunday, June 23, 2013
Swamp Play WITHOUT the Swamp!!
My kids had a blast playing in the swamp in their sand and water table!
It was so simple to set up and they had hours of fun with it! All I did is prepare 2 packages of Lime Jell-O by following the directions on the box.
After the Jell-O was refrigerated and reached it's Jell-O consistency, I dumped it in one half of the table and added some plastic frogs and bugs.
I filled the other side of the table with water and added some plastic tadpoles, fish, and frog eggs.
They had so much fun playing with the Jell-O!
Saturday, June 22, 2013
Make Your Own Delicious and Easy Lemonade! It's SO good!!
My kids love lemonade! After watching an episode of Special Agent Oso where his special assignment was to help a little girl make lemonade, they insisted that we make our own lemonade too. I promised them I would make fresh lemonade with them over the summer. Setting up their Lemonade Stand Sensory Tub a week or so ago really renewed their interest. This was my oldest son's first full week of summer break, so I figured we better make it. This is a very simple recipe and the lemonade tastes absolutely amazing!!
We started out with a pitcher filled with 10 cups of cold water. I filled the pitcher with the water and put it in the refrigerator the night before so it would be nice and cold and ready to drink as soon as we were finished. We added 2 cups of sugar and mixed it until most of the sugar evaporated.
I applied pressure and rolled 7 lemons to help release their juices and then cut them in half for my kids to juice.
They were exhausted by the time they juice the 14 halves! They had no idea that it was so much arm work to juice a lemon!
Of course they felt the need to try the lemons when they were done! My little guy's face is absolutely priceless, isn't it?
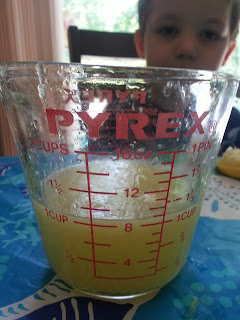
The 7 lemons gave us just over a cup of lemon juice.

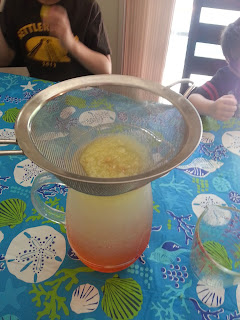
Which we poured through a sieve so that it would collect all of the pulp and the seeds. If you prefer some pulp, you can add back in as much or as little as you want.
Cheers!
They were in heaven and so was I! They couldn't believe how much work it was to make (just the juicing of the lemons part), but they said it was definitely worth it! They also decided that we should make a different flavor of homemade lemonade each week of the summer! Next week is Watermelon Lemonade!
Ingredient Recap:
6-7 Lemons to make 1 Cup of Lemon Juice
2 Cups Sugar
10 Cups of water
Thursday, June 20, 2013
Dinosaur Play Land!
This is our dinosaur play land that we set up yesterday. One side is covered with rocks and the other side is covered with our Moon Sand Dough. There are a bunch of different dinosaurs along with some different scenery items. I am in the process of making an erupting mini volcano to add to it. I decided to make this to go along with our dinosaur sensory tub and other dinosaur activities that we have been working on. I'm glad I did because my little dinosaur is loving it!

Here is my youngest all ready for some dinosaur play with his T-Rex hat that we got at that Dollar Tree and his safety goggles on! Ha! A little Paleontologist in the making!
Butterfly Symmetry Busy Bag

I made this easy to make Butterfly Symmetry Busy Bag for my kids to go along with our Butterfly Sensory Tub. The link to the free printable pattern can be found at All Our Days. It is a great activity for children of all ages!
Tuesday, June 18, 2013
Make Your Own Moon Sand with Just 3 Ingredients!
Playing with Moon Sand couldn't be more fun and making it yourself couldn't be easier! With just 3 simple ingredients your kids will be playing with Moon Sand in no time!
All you need is:
10 Cups of sand (Home Depot sells a big bag of sand for under $4)
5 Cups of Cornstarch
1 Cup of Water
Combine the sand and cornstarch well and then mix in the water. The dough shouldn't be too wet, it should just be damp so that you can mold it.
Pick Up the Worms-- A Fun and Easy To Make Busy Bag!
This is a really simple busy bag to make and the kids love it! All you need is a clothespin, a small piece of green felt, and some pipe cleaners. The green felt is your grass, the pipe cleaners are your worms, and the clothespin is your bird. The kids use the bird to collect all of the worms. You can even use this to practice color recognition and simple counting by asking your child to pick up 2 blue worms and 1 red worm.
The Kids Made Dinner Today-- Mini Pizzas with Grands! Biscuits
Tonight, I took the night off in the kitchen (well kind of) and let my kids do the cooking! They made mini Pizzas with Grands Pillsbury biscuits. They had a blast making them and they were delicious!
Ingredients
- 1 can Pillsbury Grands! refrigerated biscuits
- 1 cup pizza sauce
- 2 cups shredded mozzarella cheese
- Sliced pepperoni, peppers, sausage, bacon, or any other topping you like
Directions
Roll out or press each biscuit into 6-inch circle. Place on a greased cookie sheet. Top each round with pizza sauce, cheese and toppings.
Monday, June 17, 2013
Prevent Your Pot from Over Boiling with a Wooden Spoon!
Did you know that you can very easily prevent a pot of boiling water from over boiling? It is so simple!! Just lay a wooden spoon over the top of the pot and watch it work it's magic!
Wednesday, June 12, 2013
Lemonade Stand Sensory Tub
Just in time for summer, we put together a Lemonade Stand Sensory Tub. A sensory tub/tote is a tub or a bin that you fill up with various items to let your child play with and be hands-on. Sensory activities provide children with another meaningful avenue of learning. My son is really enjoying this one! He even made me promise him that we would make real lemonade this week! The tub contains a bunch of different lemons in a plastic produce basket, felt lemon wedges, clay lemon wedges, cups, yellow pom poms, yellow pony beads, tongs, straws, mini drink umbrellas, play money, lemon juicer, a lemonade mixer, play money, a yellow "table cloth" (I gave him a yellow microfiber towel that I picked up at the dollar store for him to use to cover his work space) and more!
He cuts the lemons....
Squeezes and juices them too...
and serves them!
I must say, he serves up the best pretend lemonade that I ever had!
Check out our recipe for real lemonade-- it is amazing!!
Check out our recipe for real lemonade-- it is amazing!!
Tuesday, June 11, 2013
Egg White + Red Cabbage Juice= Naturally Green Eggs!!
Seeing how, I had some leftover red cabbage juice from our Color Changing Magic Potion, I decided to try this out.
All I did was crack an egg and separate the yolk from the egg white.
I added a bit of the red cabbage juice, which is actually a dark purple color, to the egg white and mixed it well.
There you have it!! Green Eggs!
Perfect for St. Patrick's Day or to go along with the book Green Eggs and Ham!
Fun with Color Changing Magic Potion!!
We had a blast with this color changing magic potion!! Not only did we have fun with it, but we learned quite a bit in the process too! Did you know that red cabbage juice is a natural pH indicator? Well you do now!
You will need a cup, Red Cabbage, and white vinegar or lemon juice.
First you have to make your red cabbage juice-- Take a few leaves of red cabbage, put them in a pot of water and bring it to a boil.
Remove the leaves & let the purple potion cool.
When you are ready, pour the purple potion into a glass.
Add lemon juice or vinegar, a little bit at a time.
We used a dropper, but you can just as easily pour it into the cup.
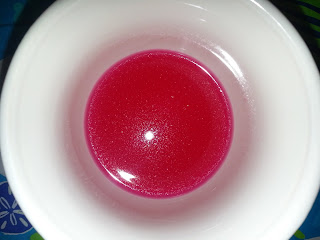
Watch as the color changes to reddish pink color.
The more you add, the prettier pink it turns!
Check out this link for the scientific explanation.
To test this further, we added baking soda to the pink potion...
The potion turned purple again!
Think of all the things you can experiment with!!
To test this further, we added baking soda to the pink potion...
The potion turned purple again!
Think of all the things you can experiment with!!
Subscribe to:
Posts (Atom)


