Saturday, December 7, 2013

Tek Recon Blasters Review

 
For those of you that don't know, Tek Recon is the newest kid on the block when it come to kid's blasters. Thanks to Tek Recon, my kids and I got to check them out. We were lucky enough to receive both the Hammer Head and the Havok blasters.  We were so excited when they arrived, I couldn't get them out of the box fast enough for my kids!


At first glance, the guns look absolutely awesome, I love the bright green and black! They look unlike any of the blasters that my kids have (with 2 boys and gun loving husband, we have a ton), totally in a good way! I love how unique and cool they look!
Tek Recon takes blasters to another level with high performance blasters combined with live online game play experience!
 

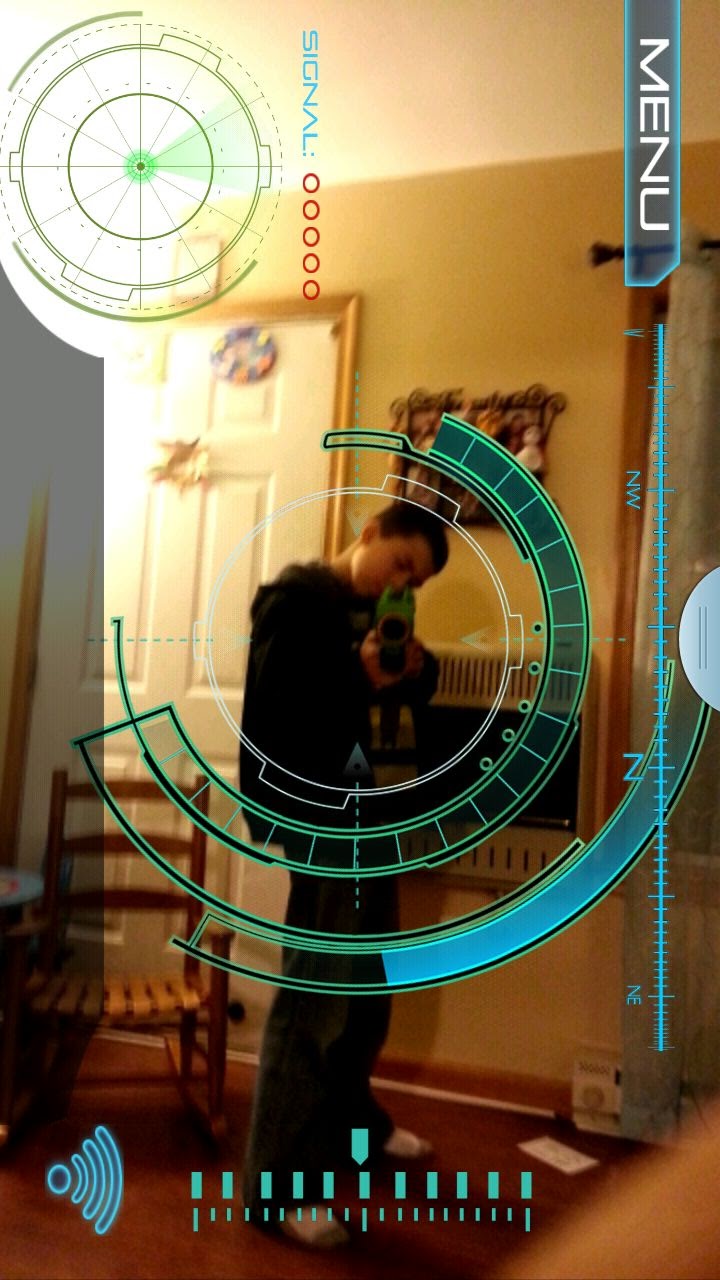
They include an add on stand to attach your smart phone for a truly unique gaming experience--  Just download the FREE Tek Recon "Live Action Online Gaming" app for your smart phone and simply connect your phone to the blaster to bring video game styled play to life through mobile and GPS technology. Tek Recon gets you off the couch, away from the games, and on the run! The app truly enhances your play experience!

The NRG rounds are specially designed for these blasters, they are small little rubbery oval rings that are coated in powder to keep them from sticking to each other. They can be fired safely up to 75 feet!  I love that the bullets do not leave any marks when they hit the walls, my kids leave enough marks on their own!
  
 
The Tek Recon Havok is the larger of the larger of the two blasters. It is a high performance semi-automatic blaster with real trigger and recoil barrel action, an adjustable shoulder stock, quick flip cartridge change, and it has a 72 round capacity.


The Tek Recon Hammer Head is the smaller blaster and is sold alone or in a two pack.  It features a functional trigger, real recoil kickback, rapid fire mode and a 25 round capacity. The Hammer Head was the perfect size for my almost 5 year old.

 
Either of the Tek Recon Blasters would make an excellent Christmas or birthday gift. Since we now have one of each, my boys asked Santa for another set so that the 4 of us can have an all out battle-- an opportunity to blast my boys and my husband?? I am all about it!!
My favorite thing about these blasters is how they get my kids excited to have some active fun and willingly turn off the television. Why play video games when you can live inside them with the Tek Recon Blasters?
 
For more information and to order yours, check out their website at  http://www.tekrecon.com/


Disclaimer:  I have received this product for review purposes only.  I have in no way been paid for my opinion. My opinion and thoughts are that of my own. Regardless, I only recommend products or services I use personally and believe will be good for my readers.


Friday, December 6, 2013

Snowman Ornaments-- Their Noses Light Up!!

Here we are in December and Christmas is less then 3 weeks away. I LOVE Christmas and so do my kids (what kid doesn't? LOL).
Pretty much everything we do this month revolves around Christmas-- Christmas crafts, making Christmas movies, making Christmas cookies, wrapping presents, Christmas shopping, counting down Christmas in at least 5 different ways... The list goes on... With that being said, of course all of our playdates are Christmas playdates of some sort! This week, we made these cute little guys.
 
Is he not the most adorable snowman ever?
He was a big hit at our last playdate!
All of the kids got to make their own (with help from mom) to take home and hang on their Christmas tree.
 
 
They are quick and easy to make too! All you need is a battery operated tea light candle, some ribbon, a pipe cleaner, some little pom poms, and glue. These can easily be done with the hot glue gun, I opted for glue dots since I was making these with kids.
 
 
Cut a piece of ribbon, fold it in half, and tie a knot to form a loop. The loop will be your hanger for the tree.

 
Glue the ribbon around the outside of the tea light and tie the loose ends in a knot to form his scarf.
Using a permanent marker, add eyes and a nose.  

 
Glue the ends of a small piece of a pipe cleaner and 2 small pom poms on to create ear muffs.
Turn your snowman on and watch him glow!

Wednesday, December 4, 2013

Christmas Sensory Tub

 
With Christmas right around the corner, I put together a Christmas Sensory Tub for my son.
For those of you that do not know what a sensory tub/tote is, it is a tub or a bin that you fill up with various items to let your child be hands-on. Sensory activities provide children with another meaningful avenue of learning.
This sensory tub is loaded with all things Christmas!


There is fake pine needles, little presents, little beaded candy canes that my son made, bells, and more!

 
I used Christmas shaped pasta as the filler.


For added fun and exploration, I added a Santa hat, reindeer ears, and a Rudolph nose.
My son wears these as he plays.

Do you have a toddler or preschool aged child? Put together a simple Christmas Sensory Tub for them! You'd be surprised  how easily you can throw one together with items that you already have!
 
Merry Christmas!
If you like what you just read please click to send a quick vote for me on Top Mommy Blogs- The best mommy blog directory featuring top mom bloggers

Monday, December 2, 2013

Pumpkin Dump Cake-- A Holiday Favorite!

 
A friend of mine made this for a Thanksgiving party that we went to and it was a huge hit! It requires limited preparation and it is so delicious! I made this pumpkin dump cake on Thanksgiving and I definitely will be making it again!

Pumpkin Dump Cake

Ingredients:

15  ounce can of pumpkin puree
12  ounce can of evaporated milk
2 teaspoons pumpkin pie spice
4 eggs
3/4 cups sugar
1 box of  yellow cake mix
1 cup butter, melted
1/4 cup chopped pecans
2  envelopes of Instant Apple Cinnamon Oatmeal                                                  

Directions:

  1. Mix pumpkin, evaporated milk, spice, eggs and sugar. Pour into ungreased 9x13 pan. Sprinkle with dry cake mix. Sprinkle oatmeal on top and then pecans. Pour melted butte on top. 
  2. Bake at 350 degrees for 40-45 minutes or until firm.
  3.  


If you like what you just read please click to send a quick vote for me on Top Mommy Blogs- The best mommy blog directory featuring top mom bloggers

Thursday, November 28, 2013

Happy Thanksgiving!

 
Happy Thanksgiving to you and your family!
Hope you have a wonderful day and enjoy all of the things that you are thankful for!

Wednesday, November 27, 2013

The First Thanksgiving Bracelet


I made these bracelets with the children in my playgroup at our Thanksgiving party to help them understand and retell the story of the first Thanksgiving. Each bead represents an important part of he first Thanksgiving and the events that led up to it.
 
 
The first brown bead represents the pilgrims who fled England seeking religious freedom.
The second bead is white, it represents the white sails of the Mayflower, the ship the pilgrims sailed on.
Next, is 3 blue beads that represent the huge ocean that the pilgrims sailed across to reach the New World. It was a long, long trip.
The green bead represents the land that the pilgrims finally saw!
The 3 white beads represent the very long and hard winter and all of the snow that came during the pilgrims first winter.
The light green bead represents the arrival of Spring.
The tan bead represents the Native American Indians that helped the pilgrims and taught them how to plant vegetables and live off of the land.
The last four beads represent the first Thanksgiving feast:
red for cranberries,
yellow for corn,
brown for turkey,
and orange for pumpkin.
Before the Native American's and the pilgrims ate, the all joined hands (twist the ends of the pipe cleaner closed) and spoke of everything that they were thankful for.


Tissue Paper Leaf Sun Catcher

We had a blast making our Tissue Paper Leaf Sun Catchers at our playdate last week, they were so much fun that we had to make another one! This is a great craft for a playdate or for a Fall party because it is easy to do and is very inexpensive. 
 
 
You can pick up everything you need in the dollar store-- clear contact paper, colored tissue paper, and construction paper. You will also need a pencil, a piece of string, scissors, and a hole punch.
 
 
Fold 1 piece of construction paper in half. Draw or trace (Google leaf template images) a leaf onto the paper and cut it out. Then cut small squares out of the tissue paper. A little goes a log way, I cut 1 strip off of each piece of tissue paper and then cut it into small squares.
 
 
Cut a rectangular piece of contact paper that when folded in half, will fill the leaf window that you made in the paper. Remove the paper from half of the contact paper and cover it with small pieces of tissue paper. Be sure to overlap the piece of tissue paper like you are making a collage.
 
 
Remove the paper backing from the other half of the contact paper and fold it over the side that has the tissue paper.

 
Open your construction paper and place your contact paper/tissue paper sandwich inside, covering the leaf window.
 
 
Glue and/or tapethe contact paper to hold it in place between both sides of the construction paper.

 
You can leave your sun catcher as is or trim it with your scissors.
Punch a hole in it and put your sting threw to hang it.

 
The sun shines nicely through it-- today was not a very sunny day, it actually snowed and rained all day, but you get the idea!
 
I am planning on making more of these with my little one in different designs, I will keep you posted!


If you like what you just read please click to send a quick vote for me on Top Mommy Blogs- The best mommy blog directory featuring top mom bloggers

Cute Toilet Paper Roll Turkey

 
My little guy made this adorable little turkey tonight before he went to bed. It is simply made using   a toilet paper roll, feathers, a small cardboard circle, foam paper for the beak and the gobble, googely eyes, and feather. Oh yeah and the best invention ever-- Glue Dots! My son made this in minutes, I helped him with the glue dots and he handled everything else. I reinforced the feathers with scotch tape to be safe. This turkey is ready for Thanksgiving! Are you?
If you like what you just read please click to send a quick vote for me on Top Mommy Blogs- The best mommy blog directory featuring top mom bloggers

Cereal Glove Turkey


We had some fun today creating our little cereal turkeys! Our turkey's feathers are Fruit Loops cereal. My little guy really enjoyed sorting (and eating) the Fruit Loops! Our turkey's body consists of Cherios and Alphabits cereal. I made the beak and gobble out of foam paper, but you could also use construction paper. I tied the glove closed with a small rubber band and stuck a small circle of cardboard on the bottom to help him stand. He is very colorful and absolutely delish-- Just ask my little guy! These are cute to add to your Thanksgiving table, especially at a child's place setting, and would also make a great Thanksgiving treat for any child!

 
If you like what you just read please click to send a quick vote for me on Top Mommy Blogs- The best mommy blog directory featuring top mom bloggers

Monday, November 25, 2013

Simple No Sew Fabric Advent Countdown Chain-- Each Link has an Activity for Our Family to Do!


With Thanksgiving just days away, I have to start preparing for Christmas. I love Christmas, it is my absolute favorite holiday.  Christmas will be here in a month and I still have so much to do!
I figured I better get to work on our "Christmas Countdown Chain." Last year, I made a paper one with my kids and they loved it! Tearing a paper link off first thing in the morning was the highlight of my little one's day. Every morning, as soon as he woke hope, he would rip one link off and then count the remaining links so he knew exactly how many days were left till Santa came. I will probably still make a paper one with him, but I wanted to make a fabric version that I could reuse  year after year. Another idea that I had thought of, was to write a family activity inside we could do each day. This was the easiest and quickest way that I came up with to combine both ideas.

 
I picked up red, green, and white satin ribbon, and self adhesive Velcro circles from the dollar store. I pulled out white address labels from my stash (they also carry these in the dollar store).

 
I used my pinking shears to cut the ribbon into small strips.
 

I cut the address labels in half long ways to make small strips that would easily fit on the ribbon.

 
On each label, I wrote a different activity that we will do each day. Some of the different activities are: Cook Dinner with Mommy, Wrap a Present, Bake Cookies, Read a Christmas Story, Make an Ornament, Make a Christmas Craft, Watch a Christmas Movie, Popcorn and a Movie Night, Spend the Night in the Living Room, Make Reindeer Noses, Ice Cream Sundae Night.....
 
 
I put the labels and the Velcro circles on the ribbon strips and arranged them in the order that I wanted them in.
 
 
We will remove the first link the day after Thanksgiving, our activity will be to start decorating the house. Saturday's activity is to go cut our Christmas Tree down and on Sunday we will decorate it.
If you like what you just read please click to send a quick vote for me on Top Mommy Blogs- The best mommy blog directory featuring top mom bloggers

Wednesday, November 20, 2013

Follow Me on Twitter!

Children At Play
Have a Twitter account?
Help me out and follow me @ChildrenAtPlay3 !
Thank you in advance!
I will be sure to follow back!!

Have Your Children Call the Santa Hotline!

 
I found this number to the Santa Hotline, so I decided to give it a try. When you call, you get Santa Claus' answering machine to his personal hotline. His reminds the kids that he I watching them and that he knows when they are good and when they misbehave. He tells them to behave for their parents and to have a Merry Christmas. At the beep, the kids have the opportunity to leave him a message along with their Christmas list. I plan on calling again with my son next week, once we decorate for Christmas.
 
Merry Christmas!!

Tuesday, November 19, 2013

Mr. Turkey Color Recognition Felt Activity

This fun felt activity focuses on color recognition, it is a lot of fun to make and do with your preschooler. My son enjoys this one even though he is now a pro with colors. It fits the theme of Thanksgiving, but great for year around fun too! 
 
 Mr. Turkey is so sad, he has lost his beautiful colorful feathers. Have your little one help him find all of his feathers so that he can be happy once again!


Mr. Turkey was so sad.

He lost the feathers he once had.

Now he wants us to help him find all of the feathers of his kind.

We will look both high and low, we will fid them, don't you know.

Here's a red one and a blue.

Look, we've found a green one too.

Here's an orange one and a yellow, soon he'll be a feathered fellow.

Now we've found the purple one, black and white--we're almost done!

If we just look up and down, I know we'll find the feather brown.

Now, Mr. Turkey is so glad!

We found the feathers he once had!


Monday, November 18, 2013

Leaf Placemats for Thanksgiving


Last week, we had some friends over for a playdate. We  had a blast making these fun Fall themed placemats. We decided to add some cute handprint turkeys to them to make them perfect for Thanksgiving. These were fun and easy to make. The kids loved going outside and searching for leaves to add to their placemat. 
 
 
To make these, you need 2 pieces of clear contact paper cut to the size of a placemat. I picked up rolls of contact paper from the Dollar Tree, I got 2 placemats (4 pieces) from each roll.  Take the paper backing off of 1 piece of contact paper and lay it sticky side up on your work space.
Place your leaves and handprint turkey wherever you like onto the sticky side of contact paper.
*I chose to cut out our handprint turkey, some didn't.
 
 
Once everything is in place, put the second sheet of contact paper on top of the first one. I found the easiest way to do this is to take the paper off as you go-- Remove the paper about an inch or two and stick that to the bottom sheet. Then, repeat with a few more inches. Continue to repeat until you are done.
 
 
Smooth the contact paper out to make sure it sticks and then trim the ends with scissors so that they are even. 
 
 
There you have it, a wonderful kid-made placemat for your child to use and show-off  on Thanksgiving!
My son is loving his, he cannot wait to show it to his Grandma & Poppie on Thanksgiving!
 
I plan on making these with the kids again next year, I think I may do them a little earlier so that we can highlight all of the beautiful colors of Fall. Here in PA, the leaves are mostly brown by the time November rolls around.
If you like what you just read please click to send a quick vote for me on Top Mommy Blogs- The best mommy blog directory featuring top mom bloggers