Friday, January 31, 2014

14 Days of Why I Love You!


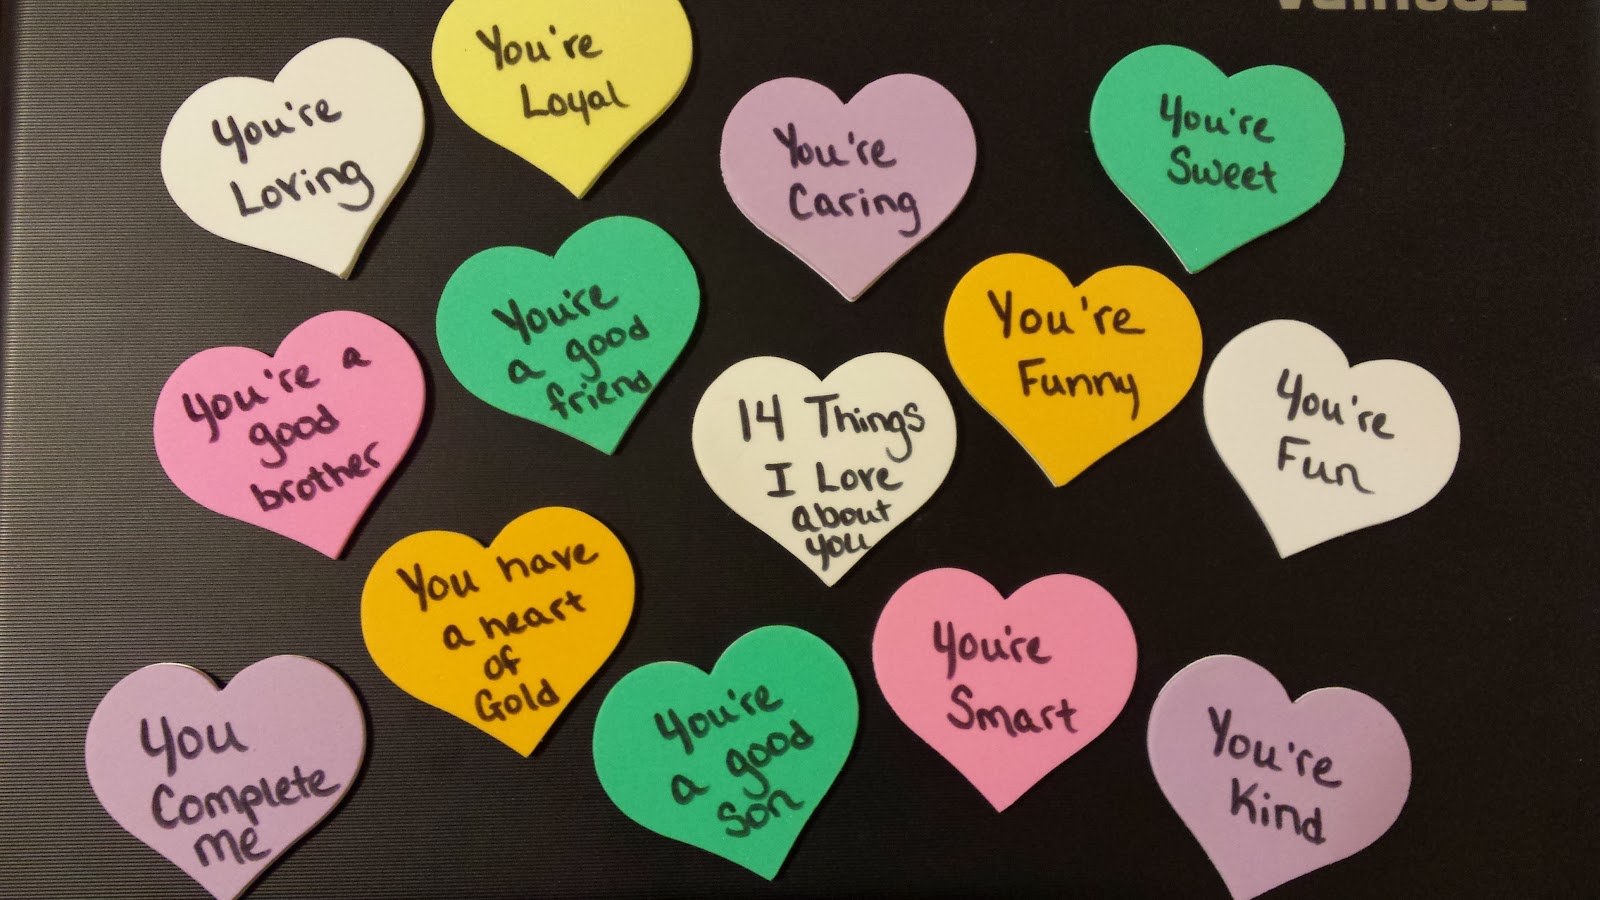
I figured I would try something a little different with my boys for Valentine's day. Instead of telling them all of the things I love about them just on Valentine's day, I thought I would tell them one a day for the 13 days leading up to Valentine's day. 


I took 14 foam heart stickers that I had from my Valentine's Day Sensory Tub and wrote 1 thing that I love about them on each heart. Starting tomorrow, February 1st, they will wake up with a heart on their bedroom door. Each morning, a new heart with a new reason will be added. The final heart will be placed on their door on Valentine's Day. 
What child wouldn't love to hear all of the things you love about them?

Tuesday, January 28, 2014

Valentine's Day Sensory Tub/Tote

 
Today, we put together our Valentine's Sensory Tub.
 
For those of you that do not know what a sensory tub is,
it is tub or a bin that you fill up with various items to let your child be hands-on. Sensory activities provide children with another meaningful avenue of learning. The tub can have a theme or include random miscellaneous items. I tend to stick with a theme, because I just find it to be more fun that way.

 
It is filled with all things Valentine's!
 
There are a ton of different hearts, including stuffed felt hearts, cookie cutters, erasers, and ornaments. There are little arrows I made from pipe cleaners and felt scraps. I also put some of my simple Felt Roses in.
 
 
I used this container of conversation heart foam stickers as the filler. I picked it up last year when it was on clearance for 75% off, I knew I'd put them to good use one way or another!

 
I also made a heart button snake to put in our tub. Button Snakes are quick and simple to make and they help preschoolers with their hand and eye coordination.
 
 
Be sure to check out all of other Sensory Tubs!
If you like what you just read please click to send a quick vote for me on Top Mommy Blogs- The best mommy blog directory featuring top mom bloggers

Monday, January 27, 2014

Heavenly Bacon Nutella Crescent Rolls-- You KNOW You Want One!!


Ingredients:

1- 8 oz tube of refrigerated crescent dinner rolls                        
8 teaspoons of Nutella or other chocolate hazelnut spread
8 slices bacon, crisply cooked, crumbled                        
Powdered sugar, if desired                        

Directions:

Heat your oven to 350°F. Separate dough into 8 triangles and spread 1 teaspoon of Nutella on each triangle. Sprinkle with small amount of crumbled bacon.  Roll up each triangle, starting at shortest side, rolling to opposite point. Sprinkle a little bacon on top of each roll. Place rolls point side down on ungreased cookie sheet. Bake 15 to 20 minutes or until golden brown. Sprinkle with powdered sugar.

I love these served warm, but they are pretty good when eaten at room temperature as well.

Sunday, January 26, 2014

Make a Statement at Your Child's Next Birthday Party with a Simple Birthday Wreath!


Lately, I am on a wreath kick... I made one for Thanksgiving, 3 for Christmas (plus 11 for gifts), a dinosaur wreath for my son's birthday party (with a second one planned), and I am working on putting together one for Valentine's Day. I decided that I wanted to make at least one wreath each month of this year to keep things interesting. I figured I would make a birthday wreath for January since my little guy's birthday is this month. This wreath will also be used in April for a week or so for my big guy's birthday.  I saw similar wreaths like this one on Etsy that were selling for over $60 and I made it for under $10! This wreath was very simple to make and it didn't take too long make either.

 
I used a hay wreath that I picked up at the craft store using a 50% off coupon, so it only cost me like $2.00. I grabbed the floral pins at the craft store, they were $1.99 for a pack of 150, I used about half of them (check the dollar store for these, sometimes they have them in stock). I purchased big packs of balloons from the dollar store, I used 4 bags for my 14 inch wreath.
 
I
Take 2 balloons and roughly fold them in half, take a floral pin and place it over the midway point of the balloons and push it completely into the wreath.


Repeat, placing the balloons next to each other in different directions until the wreath is completely covered. Please don't mind my severely peeling nail polish, my nails clearly need some attention! LOL
 
 
Once the wreath is covered, fill in as needed.
You have a beautiful, colorful, and very happy birthday wreath!


I found this little wooden pre-painted "party" sign at the craft store for $1.29 that I attached, using hot glue.
What do you think?
So cute and simple... And under $10.00!
What more could I ask for?
I love it and so does my son-- He woke up with the biggest smile the next morning because he knew it was made especially for his birthday!
 

Saturday, January 25, 2014

It's a Winter Wonderland with DIY Snowflake Garland

  Between the extremely (and abnormal) temperatures and all of the snow that we have been getting, it is truly a winter wonderland out there!
 
 
This was a fun little craft that I made with my oldest that really brought back a sense of nostalgia of my childhood. I cannot begin to count the times that I sat down with my mom or on my own to cut out snowflakes. It never really got old because every snowflake invention came out different. 
 
 
I came across snowflake templates like these while doing a search on Google.
There are so many templates available, they really take making snowflakes to another level.
Google "Snowflake Templates" now and get cutting!


Friday, January 24, 2014

Dinosaur Jars

 
For the last two weeks, I have been planning and working on my son's 5th DINO-Mite birthday party. To be honest, I think I am more excited than he is! I love the dinosaur theme, there is so much that you can do with it. I made these simple, inexpensive dinosaur jars for each of the kids to take home. They were so quick and easy to make! I used baby food jars that I had left over from a playdate that I hosted in December, some left over spray paint from various different projects that I have made over the last few months, and some small plastic dinosaurs that I picked up in the dollar store(a 10 pack for $1.00). I used  razor to scrape off the wrappers and glue that was on the baby food jars. I removed the lids and spray painted them. Then, I glued the plastic dinosaurs on top of the lids with my hot glue gun. I decided to fill the jars with jelly beans since they look like little dinosaur eggs plus they are very inexpensive and can be found year round unlike other little egg shaped candies.
 
I think they came out adorable! The will add a nice touch to the tables and the party, as well as being an extra goodie for the kids to take home!!


Monday, January 20, 2014

How Much is a Stay-At-Home Mom Really Worth?

It has been a crazy month! I really hadn't planned on taking a break from blogging, but with the craziness of the holidays, it just happened. I am working on getting back into the swing of things and blogging regularly again, I can't wait to show you all of the fun things that I have been working on!
This year, I handmade a lot of my Christmas gifts, including my son's 7 teachers and bus driver, some of their friend's gifts, and some for family members. I even handmade some gifts for my own children. For the first time, I made a topiary, which I enjoyed so much that I had to make a second one!  I had so many great Christmas crafts, projects, and homemade gifts to share, but just couldn't find the time to post them. I will share them sporadically over the next year, so that I don't overload you with Christmas stuff until we get closer to Christmas 2014.
 
With the craziness of Christmas behind me, I have been focused on my little guy's birthday. He turned 5 last week :-(  I cannot believe how fast time flies...  I cannot believe that he will be starting school in September! It breaks my heart to see him grow up so fast! Back to my point(sorry for my rambling, guess I needed to vent a bit), he had a wonderful and fun filled day! We are in the process of preparing for his DINO-mite birthday party. A ton of dinosaur posts will be coming soon! We are so excited about his party and we having a blast planning and making the decorations and favors for his party.
 
I recently came across this picture and I had to share it. To all those who say "Oh, you are just a stay-at-home mom..." (what do they know?) Check out what us moms are really worth!
I don't know about you, but with 2 boys and a messy husband, I know I sped more than 7.8 hours as a janitor and 14.4 hours as a house keeper! I'd love to see that salary in cash, but I can do without it because being a stay-at-home mom is the most rewarding job that I have ever had!