Showing posts with label cooking with kids. Show all posts

Thursday, May 8, 2014

S'mores Cake in a mug

I recently decided to become a Tupperware Consultant. Up until a month and a half ago, I didn't even know that Tupperware was still around. My friend invited me over for a Tupperware party that she was hosting and I instantly fell in love with their products! Tupperware has evolved quite a bit from what I remember. They have so many wonderful, update, and innovative products. Over the 3 weeks, I have had so much fun exploring their products. Last night, my son and I decided to try out our Tupperware Vent 'N Serve Soup Mug.
I figured what better way to test it out then with a dessert in a mug recipe.
 

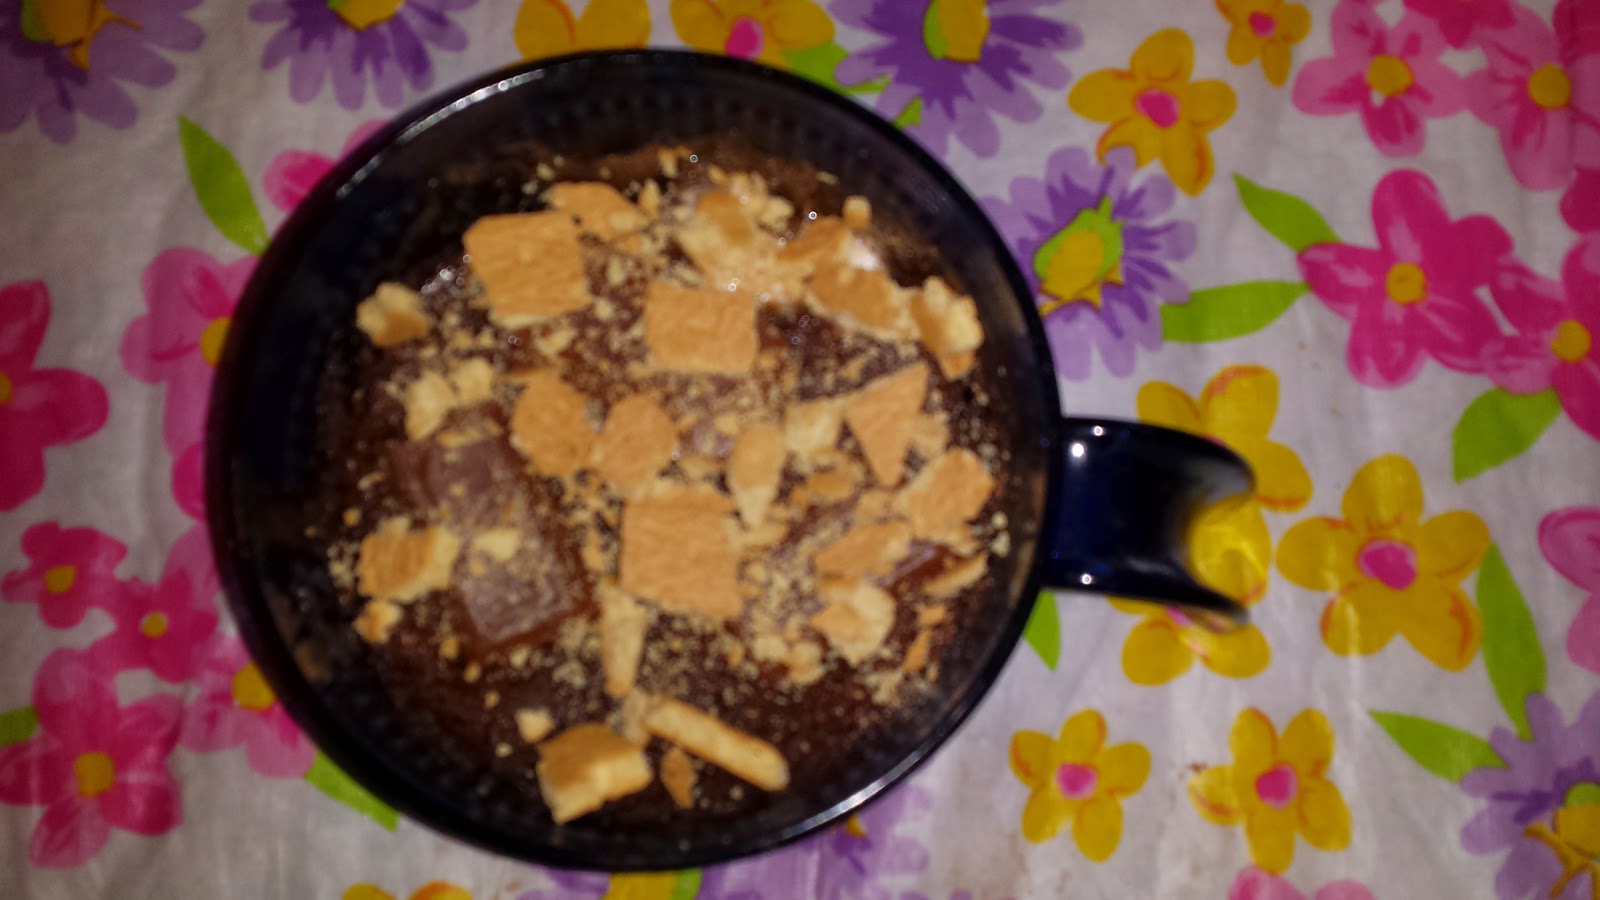
We decided to try out a new recipe, S'mores Cake in a Mug.
Like the other Mug Recipes that I have made, this was quick and easy to make.
It was a huge hit with my son!


S'mores Cake in a Mug

Ingredients
5 Tablespoons all-purpose flour
4 1/2 Tablespoons sugar
2 teaspoons unsweetened cocoa
1/4 teaspoon baking soda
Dash of salt

1/2 teaspoon white vinegar
1/4 teaspoon pure vanilla extract
2 teaspoons vegetable oil
4 1/2 Tablespoons water 

1 large marshmallow or 6 mini marshmallows
3 Hershey chocolate squares
1 graham cracker square broken into small pieces

Directions 


Using a large microwave safe mug, spray the inside with non-stick cooking spray.
 
 
Next, mix the first 5 dry ingredients in the mug.  
 
 
After mixing well, make 3 depressions in dry ingredients.  Pour vinegar in one depression, vanilla in the other and the vegetable oil in third depression.  Pour water over top.
 
 
Mix well until smooth using a fork.


Next, place 1 large marshmallow or 6 mini marshmallows in the middle of the cake mix and press down. Place in microwave and cook on high for 1 minute and 30 seconds**, uncovered at full power. Check with toothpick to make sure it comes out clean (not near the marshmallow).  Be sure not to overcook!  
 
 
When done, remove from microwave, top with the Hershey chocolate squares and sprinkle with graham cracker pieces.  Allow to cool for a few minutes. Enjoy!
Yum!!


TIPS:
**Each microwave cooks differently, adjust time accordingly! Check the cake at 1minute and 30 seconds, if it is not done, put it in for another 10 seconds or so and check it again. Repeat until the cake is done.  If you overcook the cake, it may ruin it.  Be sure to watch as it bakes. 
 
 
If you are interested in ordering a Vent 'N Serve Mug for yourself, visit www.my.tupperware.com/Magenaclemente to place an order today. Order the Vent 'N Serve Mug in May and save $5-- get yours for only $12!


Sunday, October 27, 2013

Fun Halloween Treats-- Witch Hats

 
This is another fun to make (and eat) Halloween treat. These are simple enough for the kids to make. All you need are the fudge stripped graham cookies (I get the ones from the Dollar tree, they taste just as good and are so much cheaper), icing in a tube in your choice of color, and some Hershey Kisses. Flip the cookies over, add a dab of icing in the middle, and stick the kiss onto the icing. These are great for parties and playdates because you can make an entire tray in minutes.

If you like what you just read please click to send a quick vote for me on Top Mommy Blogs- The best mommy blog directory featuring top mom bloggers

Thursday, October 24, 2013

Fun Halloween Snack-- Quick & Easy Broomsticks

 
My kids love these-- who wouldn't? They are simply peanut butter cups and pretzel sticks, a combination that most like. Whip some of these up in just minutes, your kids will be thrilled that you did!! Even better, have your kids make them!
 

Wednesday, October 23, 2013

Oreo Cookie Spiders

 
These Oreo Cookie Spiders are so much fun to make! A pack of Oreo's, some icing(to hold the M&M eyes on), licorice laces, and M&M's and you are on your way to have some fun with the kids!


Fun Food for Halloween-- Mummy Hot Dogs


I love Halloween and I especially love all of the fun foods and goodies that you can make to eat. Mummy hot dogs are one of my kids favorites and they are so easy to make. All you need are some hot dogs and a tube of crescent rolls. Roll out your dough and cut thin long strips out. Wrap them around your hot dogs to give them the mummy look. Put them on an ungreased baking sheet and bake as directed. When they are done, let them cool for a few minutes and add eyes using black cake decorating gel, mustard, or ketchup. Your kids will get a kick out of these! 

Tuesday, September 24, 2013

Crescent Roll Pizza Bites--- Fun For the Kids to Make and Eat!

 
Looks good, huh? Would you believe me if I said they are as simple as String Cheese, Peperoni, and Crescent Rolls? Well believe it!
I have really been trying to get my kids involved in cooking as many meals as possible, they are really enjoying it. I think it is so important to know how to cook, plus we really enjoy some quality time together while we cook. My kids were absolutely ecstatic when I told them what we were making-- they LOVE crescent rolls and cheese sticks are their absolute favorite snack. They thought it was so cool that we were cooking with cheese sticks!
 
 
Only 4 Ingredients :)
Crescent Rolls (I used the big and flaky ones)
Pepperoni Slices
Cheese Sticks, cut in half
Sauce for Dipping
 
 
Separate the crescent rolls. Put 2 slices of peperoni and a half of a cheese stick on the wide end of the crescent roll.


Roll them up, starting with the end that has the peperoni and the cheese and place them on an ungreased baking sheet.
 
 
Bake them in the oven on 350 degrees for about 11-12 minutes or until they are golden brown.

 
Eat them as is or serve them with some sauce on the side.
When you bite into them, the cheese is nice and stringy-- YUM!
Enjoy! 
If you like what you just read please click to send a quick vote for me on Top Mommy Blogs- The best mommy blog directory featuring top mom bloggers

Sunday, August 25, 2013

Homemade Easy Mac & Cheese in a Mug!

My kids are big fans of Easy Mac, me not so much. It is okay, but there is nothing like homemade Mac and Cheese. Unfortunately, making homemade Mac and Cheese isn't always convenient, especially during lunchtime. Today, we decided to try to make our own version of Easy Mac and homemade-- homemade Macaroni & Cheese in the microwave in minutes!! 


1/3 cup pasta
1/2 cup water
1/4 cup milk
1/2 cup shredded cheddar cheese (I like to use a Mexican Blend)

Combine the pasta and water in a large mug or bowl. Microwave on high for two minutes, then stir. Repeat this for at least 2 to 4 more minutes, stirring at each 2-minute interval. The water should absorb completely and the pasta will be cooked through. If the pasta needs another minute it is okay to add one more teaspoon of water and microwave for another minute. *The water may overflow, this is normal. Too avoid this, use a larger bowl.


Remove it from the microwave and stir in the milk and cheese. Microwave for another minute. Stir the cheese thoroughly into the pasta and eat up!

Looks good, huh?
It is!!
 
 
I even made a mug for myself and topped it with my homemade seasoning mix.
It tastes just like homemade Macaroni and Cheese!!
My kids really enjoyed making and eating this! I love when they can each make their own portion from start to finish! This would be great dorm room food!

Monday, August 19, 2013

Simple, Healthy, and Delicious Snack-- And a Great Way to Get Your Kids to Eat Yogurt!

My boys are always hungry and are always looking for a snack. This is easy to make, healthy, and delicious-- not only for my kids, but for me too! My kids enjoyed putting it together almost as much as they enjoyed eating it! We just put some Greek yogurt in a bowl, poured some honey on top, and added some fresh berries-- yum!

Sunday, August 4, 2013

Berry-licious Yogurt Pops


I am always looking for fun things to make with my kids and healthy things for them to eat.  When my youngest was teething, I used to by the Go-gurts (kids yogurt in a tube) and freeze them to help with the horrible pain of teething. Why not freeze regular yogurt? Well we did and it is delicious! Minus the freezing time and the chopping of the strawberries, these only took a few minutes for my kids to put together. I chopped the strawberries up for them and over saw the measuring, otherwise, they pretty much made them on their own.

Berry-licious Yogurt Pops Recipe

Ingredients:

1 Cup Plain Greek yogurt
1 Cup Fresh Berries of Your Choice (We used Strawberries, Blueberries, and Blackberries)
2 Tablespoons Honey
Small Paper Cups
Popsicle Sticks or Pretzel Rods

 
Mix together the yogurt, berries, and honey until combined. 


Spoon mixture into small paper cups and add a popsicle stick or pretzel rod. Freeze for about 2 hours and enjoy!
 

Saturday, August 3, 2013

Chocolate Zucchini Bread-- YUM!


My goal this summer was to teach my 12 year old son how to cook and bake. He is a Boy Scout and will soon be working on his cooking merit badge. He also goes camping once a month and is sometimes required to cook with his patrol (a small group of boys). I figured the best way to help him to excel with all of this, is to teach him at home. My kids have been helping me with dinner at least one night a week and I have been trying to bake with them at least once a week as well. My friend gave us some zucchini the other day, so I figured we would make some zucchini bread. I recently saw a recipe for Chocolate Zucchini Bread, which intrigued me. Every year, we make zucchini bread, so I figured it was time to shake things up a bit. I am so glad we did! The Chocolate Zucchini Bread came out awesome and is absolutely delicious! The bread is very moist and chocolaty! For those of you that have a garden full of zucchini, this is a definite must try! This recipe makes 2 loaves.


Chocolate Zucchini Bread


Ingredients:

3 cups all-purpose flour


Directions

Preheat oven to 350 degrees F (175 degrees C). Lightly grease two 9x5 inch loaf pans.
 
In large bowl, combine flour, cocoa, cinnamon, baking soda, baking powder and salt, mix well. 
 
In separate bowl, combine sugar and eggs, beat until well blended. Add oil and vanilla; beat until combined. Stir in zucchini. Add flour mixture; stir just until moistened. Stir in nuts and chocolate chips.
 
Spoon evenly into loaf pans.
 
Bake in preheated oven for 55 to 60 minutes, or until toothpick inserted in center comes out clean. Cool in pans for 10 minutes. Remove bread from pans; cool completely on wire rack. 


      Friday, August 2, 2013

      Refreshing Limeade Recipe


      On a hot day, there is nothing more refreshing than an ice cold drink, especially when that drink is freshly made. Today, the boys and I decided to make some fresh Limeade. It was easy to make and the boys had enjoyed squeezing all of the juice out of the limes. I premeasured the water in the pitcher and put it in the refrigerator last night so that it would be nice and cold to drink as soon as we made it. Our limes were super juicy, we actually got 3/4 cups of lime juice from 5 limes! I used the recipe in full and then cut it in half to make 3 quarts.
       
      Fresh Limeade Recipe
      Ingredients:
      • 1/2 cup Fresh Lime Juice (about 5-6 limes)
      • 2/3 cup Granulated Sugar
      • 8 cups cold water (2 Quarts)
      Directions:
      Cut the limes in half and squeeze the lime juice into a measuring cup. If you prefer no pulp, you can pour the juice through a sieve to strain the pulp. Add the sugar and stir until dissolved. Fill pitcher with cold water and add the lime juice and sugar mixture. Stir and chill in refrigerator.


      Delicious and refreshing!  What more could you ask for on a hot summer day?

      Tuesday, July 23, 2013

      What's For Lunch? Hot Dog Squid!

       
      My kids got a kick out of these during lunch time!
      My 4 year old said "These are the coolest hotdogs ever! They even taste better than regular hotdogs!" LOL Too cute! It was definitely work the extra couple of minutes to make them!
       
       
      Starting a little more than halfway down the hotdog, cut it in half lengthwise.

      Rotate the hotdog and cut again, cutting the bottom part of the hotdog into 2 parts.

      Put the hotdogs in a pot of water and bring the water to a boil.
      Prop your little squids onto a plate and serve. You can use ketchup or mustard to give the little guys eyes. Enjoy!


      Friday, July 12, 2013

      Microwave Marshmallow Caramel Popcorn-- YUM!


      This popcorn is absolutely delicious and very easy to make! You use the microwave start to finish-- it doesn't get an easier than that! My kids and I love this popcorn, it has definitely
      become a new favorite in our house! Have 10 minutes? Try it out yourself!
       
      Microwave Marshmallow Caramel Popcorn
       
      1/2 cup brown sugar 
      1/2 cup butter 
      1/2 cup mini marshmallows 
      1 bag popped popcorn

       Microwave brown sugar & butter until melted. Add marshmallows. Microwave until melted, 1 & 1/2 to 2 minutes. Pour over popcorn. Mix well.

      *This popcorn is very sticky right after you mix it, as it cools it gets less sticky. If you can't wait to eat it, grab a spoon and dig in!! That is what we do :)

      Saturday, June 29, 2013

      Peanut Butter Cup S'mores Anyone??

      I love S'mores almost as much as my kids do! Today we had some friends over, started a camp fire, and roasted marshmallows to make S'mores.  I do enjoy S'mores made with Hershey's Chocolate Bars, but my absolute favorite way is with a Reese's Peanut Butter Cup.
       
      Chocolate + peanut butter + marshmallow + gram crackers= HEAVEN
       
       
      Don't take my word for it, try it out for yourself! Trust me, you won't regret it!!
       
      Just replace the chocolate bar with a peanut butter cup and enjoy!

      Saturday, June 22, 2013

      Make Your Own Delicious and Easy Lemonade! It's SO good!!

       
      My kids love lemonade! After watching an episode of  Special Agent Oso where his special assignment was to help a little girl make lemonade, they insisted that we make our own lemonade too.  I promised them I would make fresh lemonade with them over the summer. Setting up their Lemonade Stand Sensory Tub a week or so ago really renewed their interest. This was my oldest son's first full week of summer break, so I figured we better make it. This is a very simple recipe and the lemonade tastes absolutely amazing!!
       
       
      We started out with a pitcher filled with 10 cups of cold water. I filled the pitcher with the water and put it in the refrigerator the night before so it would be nice and cold and ready to drink as soon as we were finished.  We added 2 cups of sugar and mixed it until most of the sugar evaporated.
       
       
      I applied pressure and rolled 7 lemons to help release their juices and then cut them  in half for my kids to juice.

       
      They were exhausted by the time they juice the 14 halves! They had no idea that it was so much arm work to juice a lemon!


      Of course they felt the need to try the lemons when they were done!  My little guy's face is absolutely priceless, isn't it?


      The 7 lemons gave us just over a cup of lemon juice.


      Which we poured through a sieve so that it would collect all of the pulp and the seeds. If you prefer some pulp, you can add back in as much or as little as you want.
       
       
      Cheers!

      They were in heaven and so was I! They couldn't believe how much work it was to make (just the juicing of the lemons part), but they said it was definitely worth it! They also decided that we should make a different flavor of homemade lemonade each week of the summer! Next week is Watermelon Lemonade!
       
      Ingredient Recap:
       
      6-7 Lemons to make 1 Cup of Lemon Juice
      2 Cups Sugar
      10 Cups of water


      Tuesday, June 18, 2013

      The Kids Made Dinner Today-- Mini Pizzas with Grands! Biscuits


      Tonight, I took the night off  in the kitchen (well kind of) and let my kids do the cooking! They made mini Pizzas with Grands Pillsbury biscuits. They had a blast making them and they were delicious!


      Ingredients

      1 can Pillsbury Grands! refrigerated biscuits                        
      1 cup pizza sauce                        
      2 cups shredded mozzarella cheese             
      Sliced pepperoni, peppers, sausage, bacon, or any other topping you like                       

      Directions
             
      Roll out or press each biscuit into 6-inch circle. Place on a greased cookie sheet. Top each round with pizza sauce, cheese and toppings.
                                

      Bake at 375°F 10 to 15 minutes or until bottoms are deep golden brown and cheese is bubbly.
                                
       
      Dinner is served!