Showing posts with label DIY. Show all posts

Sunday, March 30, 2014

DIY Easter Tree

This year, I decided that I wanted to make a small Easter Tree. I picked up some cute little egg ornaments from the Dollar Tree to decorate it with, all I needed was tree...  My original plan was to use a dead tree branch from outside and possibly spray paint it white.
 

Then my son and I went to Target and came across this little tree.
They wanted $10 for this little thing!
There was NO way I was paying $10 for it, I decided to make my own version of it.
I made it with items that I had on hand, it didn't cost me a penny to make it!
 
 
My husband is a bit obsessed with tie wire and seems to have an endless supply, so I used it to form my tree.

 
I wrapped it top to bottom with yarn.
I used white yarn for the majority of the tree and then wrapped the ends in different colors.
 
 
When I finished wrapping it in yarn, which took a very long time, I put it in a little tin Easter bucket. I topped it off with some jelly beans and added my egg ornaments.
My little tree is all ready for Easter!!

Monday, March 3, 2014

Little Dragon Glove Puppet


I made this adorable little dragon glove  puppet to add to our Dragon Sensory Tub that we are working on putting together. I made it using an odd glove that I couldn't find a match for (We ALWAYS have mateless gloves, my children lose gloves like the lose socks!!), felt, 2 buttons, and 2 googley eyes. If you don't have any loney mateless gloves, you can always pick up a set in the dollar store. You should be able to find all of the other items needed in  the dollar store if you don't have them lying around in your house.  I got the pattern for his wings and crest off of Spoonful.com. Once I cut my felt pieces out and sewed them on along with buttons. I used my hot glue gun to glue the googey eyes on.
Now he is all ready for play!
This little glove puppet is an awesome little gift for any little dragon lover! This would also be a great, inexpensive party favor for the kids to take home from a dragon party! 


If you like what you just read please click to send a quick vote for me on Top Mommy Blogs- The best mommy blog directory featuring top mom bloggers

Make Your Own Snow Globes on a Snowy Day!

 
Here in PA, it has been a long, cold, and snowy winter-- and we still have a few months to go!
I am not much of a winter person myself, but I always try to make the best of it for my boys.
On yet another "snow day," the kids were home from school and with the abnormal cold temperatures that we have been experiencing, the kids were looking for something to do inside. I decided to make some snow globes with them. Since Christmas passed, I figured we would make some with our pictures in them instead of the ones we made in the past.
 
 
First, we painted the lid of a stage 2 baby food jar with silver paint.
Using a razor, scrape off any excess glue that was left behind from the label.

 
Then, I grated a piece of pvc piping to make the snow. I used a cheap grater that I had picked up in the dollar store awhile back because I was afraid it might ruin my grater that I use all of the time... I was right, the pvc pipe definitely did a number on the grater!
 
 
You do not need a lot, a little goes a long way.
Cut your picture into a strip that will fit inside of the jar.
Using packaging tape, laminate the picture. Put one piece of tape on each side of the picture, making sure that the ends of the tape touch. *The top of the jar will be the bottom of the snow globe, so you want to place your picture inside upside down.
 
Place your laminated picture in the jar, try to push the picture so that it fits snuggly into the grooves of the jar. Add water, you want to fill it just about to the top. Add a drop of clear glue or glycerin to help keep the pieces of "snow" from clumping.
Put the lid on and glue in place using hot glue or crazy glue. This step will help eliminate leaking.
 
You have your very own snow globe!
These would make awesome gifts for next Christmas!


If you like what you just read please click to send a quick vote for me on Top Mommy Blogs- The best mommy blog directory featuring top mom bloggers

Sunday, February 9, 2014

DIY Rainbow Dinosaur Crayons-- Fun Party Favors for Our DINO-Mite Dinosaur Party!

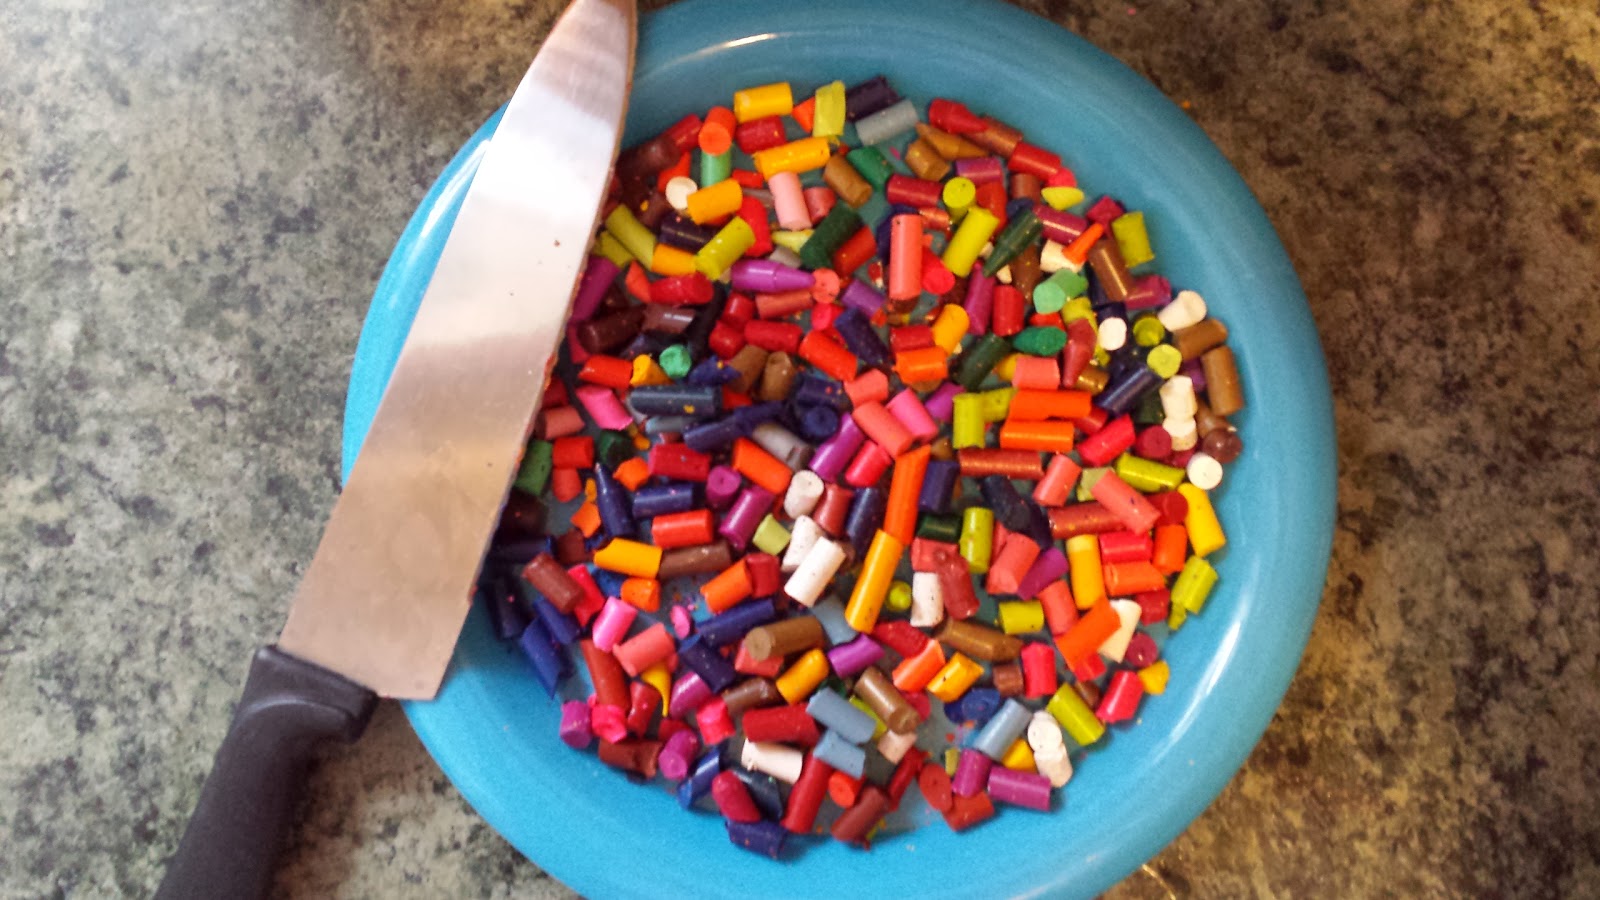
We always save our broken crayons for use in other projects. They always seem to add up pretty quickly between my kids and our play group playdates.  We decided to use this bundle of broken crayons to make rainbow dinosaur crayons for my son's dinosaur party.
I purchased a few of these silicon dinosaur trays off of Amazon to make some dinosaur chocolates and dinosaur ice cubes. They also work great to make crayons in!
 
 
I used a knife to cut the larger pieces into smaller pieces.


My son filled the silicon tray with the little crayon pieces, filling each compartment just over the top.
 
 
We put it in the oven at 230 degrees for 15 minutes.
 
 
Let the wax cool completely before removing them from the tray.
They came out absolutely adorable, don't you think?
I will be putting these little guys in the goodie bags, as well as inside of the plastic eggs for our dinosaur egg hunt!

Tuesday, February 4, 2014

Pretty Fabric Wreath for Valentine's Day


I learned how to make these simple, but pretty wreaths years ago when I was in high school.
Since then, I have made a bunch of them, some for gifts and many for myself. I made some for Christmas, Winter, Fall/Thanksgiving, and now one for Valentine's Day.

To make your own, all you need is some coordinating fabric of your choice,  floral pins, and a hay wreath of your choice. You will need shears or another method to cut the fabric into 2 in. x 2 in. squares, I think it is easiest to use my rotary cutter.


Feed one side of a floral pin in and out of the edge of a fabric square, continue until you do this all the way around the square.

 This is what it should look like when you are finished.

 Push the floral pin all the way into the wreath.
Repeat the process until the wreath is covered and full.

 If you decided to use multiple fabrics, like I did for this wreath, be sure to mix them up sporadically so that they blend in with each other and almost form a pattern.

Saturday, February 1, 2014

Pretty DIY Heart Garland for Valentine's Day

This year, I am having my son's birthday party a few days  before Valentine's Day and I have been busy, busy, busy with preparations for it, so I am a little pressed for time when it comes to making Valentine's Day decorations. I have been trying to come up with a few ways to make some simple decorations that are both fast and easy to make and can be thrown up and taken down easily. 
This Valentine's Day garland that I made out of heart doilies, fits the bill.


Not only does this garland look pretty with the sunlight shinning through it, but it was so simple and inexpensive to make. 


As soon as I saw these doilies in the Dollar Tree, I knew I wanted to make garland out of it.
With 30 hearts for a dollar, you can make a lot of garland!


I cut a piece of white yarn a little bit longer than the length  that I wanted the garland to be and then fed it through the holes in the heart doilies. I then used the extra yarn on the ends to hang it up.
Simple and easy, I even got to catch up on one of my shows while I made it! 

Sunday, January 26, 2014

Make a Statement at Your Child's Next Birthday Party with a Simple Birthday Wreath!


Lately, I am on a wreath kick... I made one for Thanksgiving, 3 for Christmas (plus 11 for gifts), a dinosaur wreath for my son's birthday party (with a second one planned), and I am working on putting together one for Valentine's Day. I decided that I wanted to make at least one wreath each month of this year to keep things interesting. I figured I would make a birthday wreath for January since my little guy's birthday is this month. This wreath will also be used in April for a week or so for my big guy's birthday.  I saw similar wreaths like this one on Etsy that were selling for over $60 and I made it for under $10! This wreath was very simple to make and it didn't take too long make either.

 
I used a hay wreath that I picked up at the craft store using a 50% off coupon, so it only cost me like $2.00. I grabbed the floral pins at the craft store, they were $1.99 for a pack of 150, I used about half of them (check the dollar store for these, sometimes they have them in stock). I purchased big packs of balloons from the dollar store, I used 4 bags for my 14 inch wreath.
 
I
Take 2 balloons and roughly fold them in half, take a floral pin and place it over the midway point of the balloons and push it completely into the wreath.


Repeat, placing the balloons next to each other in different directions until the wreath is completely covered. Please don't mind my severely peeling nail polish, my nails clearly need some attention! LOL
 
 
Once the wreath is covered, fill in as needed.
You have a beautiful, colorful, and very happy birthday wreath!


I found this little wooden pre-painted "party" sign at the craft store for $1.29 that I attached, using hot glue.
What do you think?
So cute and simple... And under $10.00!
What more could I ask for?
I love it and so does my son-- He woke up with the biggest smile the next morning because he knew it was made especially for his birthday!
 

Saturday, January 25, 2014

It's a Winter Wonderland with DIY Snowflake Garland

  Between the extremely (and abnormal) temperatures and all of the snow that we have been getting, it is truly a winter wonderland out there!
 
 
This was a fun little craft that I made with my oldest that really brought back a sense of nostalgia of my childhood. I cannot begin to count the times that I sat down with my mom or on my own to cut out snowflakes. It never really got old because every snowflake invention came out different. 
 
 
I came across snowflake templates like these while doing a search on Google.
There are so many templates available, they really take making snowflakes to another level.
Google "Snowflake Templates" now and get cutting!


Friday, January 24, 2014

Dinosaur Jars

 
For the last two weeks, I have been planning and working on my son's 5th DINO-Mite birthday party. To be honest, I think I am more excited than he is! I love the dinosaur theme, there is so much that you can do with it. I made these simple, inexpensive dinosaur jars for each of the kids to take home. They were so quick and easy to make! I used baby food jars that I had left over from a playdate that I hosted in December, some left over spray paint from various different projects that I have made over the last few months, and some small plastic dinosaurs that I picked up in the dollar store(a 10 pack for $1.00). I used  razor to scrape off the wrappers and glue that was on the baby food jars. I removed the lids and spray painted them. Then, I glued the plastic dinosaurs on top of the lids with my hot glue gun. I decided to fill the jars with jelly beans since they look like little dinosaur eggs plus they are very inexpensive and can be found year round unlike other little egg shaped candies.
 
I think they came out adorable! The will add a nice touch to the tables and the party, as well as being an extra goodie for the kids to take home!!


Tuesday, November 12, 2013

Wooden Butter for a Play Kitchen

My youngest is dying for a play kitchen. He had one a few years ago, but I got rid of it when he no longer played with it. With all of the cooking and baking we have done, it seems to have renewed his interest. We have decided to get him one for Christmas, I actually bought a used one off of my friend. It is an awesome wooden kitchen, he is going to be so excited when he sees it. I am not a big fan of the cheap plastic play food, I prefer the wooden and felt food. The wooden and felt food seems to hold up a lot better. To go along with the kitchen, I have decided to make him a set of felt food. When I was at the craft store picking up some felt, I came across these little wooden tiles.
 
 
I thought they were the perfect size to make little wooden slabs of butter. For just over $1, I decided to grab them.
 
 
I painted them with a few coats of yellow acrylic paint....

 
Now he'll have 5 little slices of butter to add to his play food, they will go perfectly with the wooden stick of butter that he already has.
I can't wait till Christmas, he is going to be ecstatic when he sees his kitchen and all his new play food!
 
 
If you like what you just read please click to send a quick vote for me on Top Mommy Blogs- The best mommy blog directory featuring top mom bloggers

Sunday, November 3, 2013

Chalkboard Coffee Mugs-- Great Idea for Teacher Gifts!

 
I made these chalkboard coffee mugs for prizes for my best friend's bridal shower.  They were simple to make and they went along with the chalkboard theme that I was doing.  They were quick and easy to make, the most time consuming part was letting them dry completely.  I used chalkboard paint for glass that I found in a craft store and painted regular mugs from the dollar store. When they were done, we used a chalk marker to write "Allie's Bridal Shower" and the date on it (it will easily wash off), and we filled them with flavored teas, coffee, hot chocolate, and apple cider. They were put in a gift bag along with a package of biscotti from Trader Joe's. 
 
These mugs would make cute gifts for the holiday's, especially for teachers. You could fill them with hot beverage mixes like I did or fill them with candy in a pretty holiday cellophane bag. I will definitely be making more next month for my son's teachers.

If you like what you just read please click to send a quick vote for me on Top Mommy Blogs- The best mommy blog directory featuring top mom bloggers

Saturday, October 26, 2013

Our Little Spider Pumpkin


My youngest and I went to my girlfriend's house last week and she had a little pumpkin decorated as a spider that she made with her son. My son told me then and there that he wanted to make one too. I asked her about it and she said that it was a craft kit that she got for like $10. $10 for a spider pumpkin? I was quickly rethinking making one with my son...
 
The next night, I had to run to Target to pick up a few things. I found black glittery Styrofoam pumpkins in the dollar section. Jackpot! I grabbed one to turn into a spider and two others, I'd find a use for them when I got home. When we got home, we stuck some pipe cleaners into the pumpkin for legs and glues googley eyes on him to make him a spider. It cost me $1 for the pumpkin, everything else I had in my stash. My son loves his little spider pumpkin and since it is made out of Styrofoam, it can be used year after year.
 
We turned another pumpkin into an Eyeball Monster Pumpkin and decided to leave the third one plain, at least for now.
 

Thursday, October 17, 2013

Spooky Eyes Halloween Wreath

 
Last night I made this very simple, but cute wreath. I spray painted a foam wreath black, let it dry completely, and hot glued a bunch of googley eyes onto it. Like I said, very simple, but cute! It matches our Eyeball Monster Pumpkin perfectly!
 

Easy to Make Doc Mc Stuffin's Stethoscopes


We are working on putting together a Community Helpers Sensory Tote and one of the items I decided to make was a stethoscope. I used headbands, ribbon, and felt. I picked up all of the materials from the Dollar Tree-- the headbands were 6 for $1, ribbon was $1 for the roll, and the felt was a pack for $1. I made 6 of these stethoscopes for $3 and still had felt and ribbon leftover! I cut long rectangles of felt, wrapped them around the end of the headbands, and hot glued them into place for the ear pieces. I used about a foot long piece of ribbon for the strap and cut out 2 circles out of felt and glued them together with the tip of the ribbon in between them. I then cut a small band aid out of felt to glue on top. You can even add a small heart on the band aid if you like! The kids are really enjoying these, my son takes it out every time we watch Doc Mc Stuffin's on TV. I will definitely be making more of these for Christmas presents!

Tuesday, October 15, 2013

Bridal Shower Chalkboard Decoration

 
This was one of the decorations  did for my best friends bridal shower this past weekend. It was so simple to do and it looked great. I used a large chalk board that I picked up on Amazon and chalk board markers. You can totally use chalk if you like, I just prefer the markers because they don't smudge or rub off once they dry.

DIY Bridal Shower Centerpieces

Life has been so crazy lately! I spent the last few weeks preparing for my best friend's bridal shower amongst everything else that we had going on. As the Maid of Honor, I had a big part in planning her bridal shower. The shower was a bit of a rush due to the fact that she found out in the beginning of September that she is moving to South Dakota on the 19th of October. We decided that it was best to have the shower  before she moves so that she can pack all of her gifts on the moving truck. The shower turned out wonderfully and my friend was so happy! It was a great way to end her last weekend in PA.
Anyways, I wanted to share the centerpieces that I made for the tables. They really ended upcoming out so cute and they really fit the bride's personality.


Aren't they cute? I was so happy with them and so was the bride!

 
I collected wine bottles and spray painted them with black chalk board paint. I sprayed one coat, let them dry for about 20 minutes, and then sprayed them with a second coat of paint. I let the chalk board paint cure for 48 hours. I then added some ribbon, using my hot glue gun, on the top and bottom to dress them up. I put some fake flowers in them, I picked hot pink flowers since her wedding colors are hot pink and black.
 
 
This one was an empty Rum Chata bottle that we shared with her sister a few weeks ago. I figured I'd use it since it symbolized one of our last get-to-gether's before she moved. I love the shape!
 
To finish them off, I used chalk board markers (you could use chalk, but the markers do not rub off once the dry) to write different sayings like "Always & Forever," "Here Comes the Bride," "Headed to the Chapel," "Mr. & Mrs.," "True Love"...
 
Overall, they were a huge hit! If you prefer not to use the chalk board paint, they looked awesome in all black with just the flowers.
It is amazing how things transform with a little bit of paint!

Wednesday, September 25, 2013

Simple DIY Scarf Holder

 
I love scarves, especially in the cooler months and here in PA, unfortunately there are more cooler months than warmer months... I have a bunch of scarves, I needed a better way to organize and hang them.  
 
 
I headed to the dollar store and grabbed some shower curtain rings (the round plastic rings work great too) and hooked them onto the bottom of a hanger. I then ran the scarves through the rings and I was done!
 
 
I love it! Now, my scarves are organized and easy to find!
 
 
If you like what you just read please click to send a quick vote for me on Top Mommy Blogs- The best mommy blog directory featuring top mom bloggers